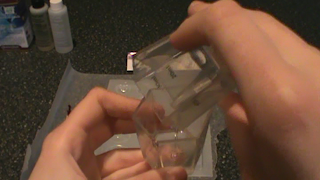
Resin, when hardened, is a
preservative casing. It’s often used for
plants and insects. However, it works
just as well for charms. I’ve used it
before to create a casing for an origami lily, which I was then able to turn
into a necklace for my friend’s birthday.
Resin-cast objects make for high-grade mementos.
Materials
Needed
·
Easy Cast
resin and hardener (purchasable at many craft stores)
·
2 plastic measuring cups
·
2 wooden stirring sticks (toothpicks work)
·
A small object you wish to preserve (make sure
it will fit inside the mold)
·
Wax paper or news paper
·
Time and patience
Instructions
1. Spread
the news or wax paper out onto a clean, dry surface for protection. (You may also wish to wear a smock over your
clothes if you’re the messy type. Any
resin that spills should be cleaned up A.S.A.P.
Its sticky and you don’t want it hardening on anything.)
2. Fill
the selected mold with water, then pour that water in one measuring cup. This should tell you how much resin mixture
you will need to fill it. Afterwards, dry
both cup and mold with cloth.
3. Divide
the measurement you just took by half.
Let’s say you measured that you will need 2 tbsp of resin mixture. In one measuring cup, you would pour 1 tbsp
of the actual resin (labeled Easy Cast
resin). In the second measuring cup, you
would pour 1 tbsp of hardener (labeled Easy
Cast hardener). Make sure to do all
of this over your wax or news paper.
4. Now,
pour the contents of one measuring cup completely into the other. You can use your first wooden stirrer to
scrape it all out. Still using the
wooden stirrer, mix the two substances together for two minutes. You will see small, foamy bubbles, but that’s
okay. They won’t appear in the finished
piece.
5. Pour
the contents of the measuring cup back into the other measuring cup, using your
second stirrer to stir for another
minute. This is called a double-mixing
process.
6. Carefully,
pour this mixture into your clean mold.
DO NOT OVERFILL. Also, leave
enough space that you will be able to fit your charm inside.
7. Place
charm inside the resin mixture. The
second stirring stick can be used to position it if necessary. For example, I am using silver sparkles and a
bead. (As a fair warning, materials
placed in resin will sink to the bottom of the mold.) If you notice bubbles, they will rise and
remove themselves during the settling process.
8. Keep
your mold in a warm, dry area to harden.
It will be “soft set” in 24 hours, at which point it is removable, but
easily scratched, dented, or otherwise damaged.
It will be “hard set” in 72 hours, by which point it will be more
durable and should have a glassy texture.
9. When
your resin is set, bend the mold to pop the charm out. It may take some effort. Do not try to hack it out with a knife, lest
you do damage.
10. Your
piece is finished. Enjoy and remember
well.


No comments:
Post a Comment